In this post, you will learn how configure Flowable’s apps to use your custom Spring Boot REST API as a backend engine. All this, in a dockerized environment.
What you’ll need
- About 30 minutes
- Docker Desktop for you operating system already installed. For this tutorial, we used Docker Desktop for Windows. You can download it from here.
- Download Flowable war files. You can download them from here. We need a fresh copy without any modification.
- Download MySQL Connector/J. You can download it from here.
- A Spring Boot application that has Flowable’s engine integrated. You can follow our post Integrate Flowable into your Spring Boot Application if you do not have one.
- A favorite IDE. In this post, we use Intellij Community
- JDK 7 or later. It can be made to work with JDK6, but it will need configuration tweaks. Please check the Spring Boot documentation
Introduction
Flowable offers four web applications to help us understand the functionalities provided by the project. Here is a brief description of these four apps (quoting Flowable’s documentation):
- Flowable IDM: an Identity Management application that provides single sign-on authentication functionality for all the Flowable UI applications, and, for users with the IDM administrative privilege, it also provides functionality to manage users, groups and privileges.
- Flowable Modeler: an application that allows users with modeler privileges to model processes, forms, decision tables and application definitions.
- Flowable Task: a runtime task application that provides functionality to start process instances, edit task forms, complete tasks and query on tasks and process instances.
- Flowable Admin: an administrative application that allows users with admin privilege to query the BPMN, DMN, form and content engines and provides several options to change process instances, tasks, jobs and so on. The admin application connects to the engines through the REST API that is deployed together with the Flowable Task app and the Flowable REST app.
By default, all the apps connect to the Flowable Task REST API, but you can easily change this to use the Flowable REST app or a custom REAT API instead. Let’s see how this is done.
Folder Structure
This is the folder structure that we will be using for this tutorial:
root
  |- flowable-docker
       |- wars
           |- flowable-admin.war
           |- flowable-idm.war
           |- flowable-modeler.war
           |- flowable-task.war
           |- spring-flowable-integration-1.0.0.war
       |- tomcat-users-xml
       |- DockerfileRest
       |- DockerfileTomcat
       |- docker-compose.xml
Integrating Flowable into a Spring Boot Application
For this tutorial, you will need a Spring Boot app which includes Flowable’s engine and REST API. If you do not have one, you can either create one by following the steps explained in our post Integrate Flowable into your Spring Boot Application.
In our example, we will use the app created in our previous post. However, we will do some modifications. Download the source code from our GitHub repository, and open it with your favorite IDE.
Once loaded, open the pom.xml file and add the following MySQL dependency:
<dependency>
  <groupId>mysql</groupId>
  <artifactId>mysql-connector-java</artifactId>
  <scope>runtime</scope>
</dependency>
Now, compile it, generate the war file and copy it to the folder /root/flowable-docker/wars. Notice that we have rename the file to spring-flowable-integration-1.0.0.war.
Creating the Tomcat User file
So that we can access the management app’s web page that Tomcat offers, we can add some user with valid credentials and roles. Create the following file and called tomcat-users.xml under flowable-docker folder:
<?xml version="1.0" encoding="UTF-8"?>
<tomcat-users xmlns="http://tomcat.apache.org/xml"
              xmlns:xsi="http://www.w3.org/2001/XMLSchema-instance"
              xsi:schemaLocation="http://tomcat.apache.org/xml tomcat-users.xsd"
              version="1.0">
  <user
       username="tomcat"
       password="tomcat"
       roles="tomcat,standard,manager-gui,manager-status,manager-script,manager-jmx"
  />
</tomcat-users>
Here, we have created a user called tomcat, with tomcat as password, and assigned the following roles: tomcat,standard,manager-gui,manager-status,manager-script,manager-jmx.
Creating the Dockerfile for the Tomcat Service
Docker has a simple file format called Dockerfile, which uses to specify the layers of an image. Having said this, let’s go ahead and create a Dockerfile for our Tomcat service using your favorite text editor under flowable-docker folder. Name it DockerfileTomcat:
# Use an official Tomcat runtime as a parent image
FROM tomcat:8.0-jre8

ENV DIRPATH /usr/local/tomcat

# Copy Tomcat users into the container at /conf
COPY ./tomcat-users.xml $DIRPATH/conf

# Copy flowable-admin war file into the container at /webapps
COPY ./wars/flowable-admin.war $DIRPATH/webapps

# Copy flowable-idm war file into the container at /webapps
COPY ./wars/flowable-idm.war $DIRPATH/webapps

# Copy flowable-modeler war file into the container at /webapps
COPY ./wars/flowable-modeler.war $DIRPATH/webapps

# Copy flowable-task war file into the container at /webapps
COPY ./wars/flowable-task.war $DIRPATH/webapps

# Make port 8080 available to the world outside this container
EXPOSE 8080

# Run CMD "catalina.sh" when the container launches
CMD ["catalina.sh", "run"]
This Dockerfile is very simple, but that’s all you need to run a container with Tomcat. This is what the file does:
COPYthe file tomcat-users.xml to/user/local/tomcat/confCOPYflowable-admin war file into the container at/webappsCOPYflowable-idm war file into the container at/webappsCOPYflowable-modeler war file into the container at/webappsCOPYflowable-task war file into the container at/webapps- Make port 8080 available to the world outside this container
- Run
CMDcatalina.shwhen the container launches
Creating the Dockerfile for the Spring Boot Application
The Dockerfile used for our Spring Boot app is also very simple too. Create a Dockerfile for it using your favorite text editor under flowable-docker folder. Name it DockerfileRest:
# Use an official alphine as a parent image
FROM openjdk:8-jdk-alpine

# Copy spring-flowable-integration war file into the container
COPY ./wars/spring-flowable-integration-1.0.0.war app.war

# Run the app when the container launches
ENTRYPOINT ["java", "-jar", "app.war"]
This Dockerfile is very simple, but that’s all you need to run a container with Tomcat. This is what the file does:
COPYthe file spring-flowable-integration-1.0.0.war and name is app.war- Run
ENTRYPOINTjava -jar app.warwhen the container launches
Creating docker-compose.yml file
In the file, we specify several services:
- mysql-db: Runs a MySQL database.
- adminer: Database manager, so that we can access the database from a web interface.
- backend-rest: Alphine system from which our custom REST API is executed.
- tomcat: Runs an Apache Tomcat web server, and all of Flowable’s apps.
version: '3.7'
services:
  mysql-db:
    image: mysql:5.7.26
    container_name: mysql
    command: --default-authentication-plugin=mysql_native_password
    volumes:
      - db_data:/var/lib/mysql
    environment:
      MYSQL_ROOT_PASSWORD: flowable
      MYSQL_USER: flowable
      MYSQL_PASSWORD: flowable
      MYSQL_DATABASE: flowable
    ports:
      - "3306:3306" # Forward the exposed port 3306 on the container to port 3306 on the host machine
    networks:
      - service-network

  adminer:
    image: adminer
    container_name: adminer
    ports:
      - 18080:8080
    networks:
      - service-network

  backend-rest:
    build:
      context: .
      dockerfile: DockerfileRest
    image: openjdk:8-jdk-alpine
    container_name: backend-rest-api
    ports:
      - "8181:8080" # Forward the exposed port 8181 on the container to port 8080 on the host machine
    environment:
      - SERVER_PORT=8080
      - SERVER_SERVLET_CONTEXT-PATH=/rest
      - SPRING_DATASOURCE_DRIVER-CLASS-NAME=com.mysql.cj.jdbc.Driver
      - SPRING_DATASOURCE_URL=jdbc:mysql://mysql-db:3306/flowable?autoReconnect=true
      - SPRING_DATASOURCE_USERNAME=flowable
      - SPRING_DATASOURCE_PASSWORD=flowable
    depends_on:
      - mysql-db # This service depends on mysql. Start that first
    networks:
      - service-network

  tomcat:
    build:
      context: .
      dockerfile: DockerfileTomcat
    image: tomcat:8.0-jre8
    container_name: tomcat-with-flowable-apps
    ports:
      - "8080:8080" # Forward the exposed port 8080 on the container to port 8080 on the host machine
    environment:
      - SPRING_DATASOURCE_DRIVER-CLASS-NAME=com.mysql.cj.jdbc.Driver
      - SPRING_DATASOURCE_URL=jdbc:mysql://mysql-db:3306/flowable?autoReconnect=true
      - SPRING_DATASOURCE_USERNAME=flowable
      - SPRING_DATASOURCE_PASSWORD=flowable
      - FLOWABLE_COMMON_APP_IDM-URL=http://localhost:8080/flowable-idm
      - FLOWABLE_COMMON_APP_IDM-REDIRECT-URL=http://localhost:8080/flowable-idm
      - FLOWABLE_COMMON_APP_IDM-ADMIN_USER=admin
      - FLOWABLE_COMMON_APP_IDM-ADMIN_PASSWORD=test
      - FLOWABLE_ADMIN_APP_SERVER-CONFIG_PROCESS_SERVER-ADDRESS=http://backend-rest
      - FLOWABLE_ADMIN_APP_SERVER-CONFIG_PROCESS_PORT=8080
      - FLOWABLE_ADMIN_APP_SERVER-CONFIG_PROCESS_CONTEXT-ROOT=rest
      - FLOWABLE_ADMIN_APP_SERVER-CONFIG_PROCESS_REST-ROOT=process-api
      - FLOWABLE_ADMIN_APP_SERVER-CONFIG_CMMN_SERVER-ADDRESS=http://backend-rest
      - FLOWABLE_ADMIN_APP_SERVER-CONFIG_CMMN_PORT=8080
      - FLOWABLE_ADMIN_APP_SERVER-CONFIG_CMMN_CONTEXT-ROOT=rest
      - FLOWABLE_ADMIN_APP_SERVER-CONFIG_CMMN_REST-ROOT=cmmn-api
      - FLOWABLE_ADMIN_APP_SERVER-CONFIG_DMN_SERVER-ADDRESS=http://backend-rest
      - FLOWABLE_ADMIN_APP_SERVER-CONFIG_DMN_PORT=8080
      - FLOWABLE_ADMIN_APP_SERVER-CONFIG_DMN_CONTEXT-ROOT=rest
      - FLOWABLE_ADMIN_APP_SERVER-CONFIG_DMN_REST-ROOT=dmn-api
      - FLOWABLE_ADMIN_APP_SERVER-CONFIG_FORM_SERVER-ADDRESS=http://backend-rest
      - FLOWABLE_ADMIN_APP_SERVER-CONFIG_FORM_PORT=8080
      - FLOWABLE_ADMIN_APP_SERVER-CONFIG_FORM_CONTEXT-ROOT=rest
      - FLOWABLE_ADMIN_APP_SERVER-CONFIG_FORM_REST-ROOT=form-api
      - FLOWABLE_ADMIN_APP_SERVER-CONFIG_CONTENT_SERVER-ADDRESS=http://backend-rest
      - FLOWABLE_ADMIN_APP_SERVER-CONFIG_CONTENT_PORT=8080
      - FLOWABLE_ADMIN_APP_SERVER-CONFIG_CONTENT_CONTEXT-ROOT=rest
      - FLOWABLE_ADMIN_APP_SERVER-CONFIG_CONTENT_REST-ROOT=content-api
      - FLOWABLE_ADMIN_APP_SERVER-CONFIG_APP_SERVER-ADDRESS=http://backend-rest
      - FLOWABLE_ADMIN_APP_SERVER-CONFIG_APP_PORT=8080
      - FLOWABLE_ADMIN_APP_SERVER-CONFIG_APP_CONTEXT-ROOT=rest
      - FLOWABLE_ADMIN_APP_SERVER-CONFIG_APP_REST-ROOT=app-api
      - FLOWABLE_MODELER_APP_DEPLOYMENT-API-URL=http://backend-rest:8080/rest/app-api
    depends_on:
      - mysql-db # This service depends on mysql. Start that first
      - backend-rest
    networks:
      - service-network

# Networks to be created to facilitate communication between containers
networks:
  service-network:

# Volumes
volumes:
    db_data: {}
So that the containers can communicate between them, we have created a network that we have called service-network.
Let’s have a quick look at mysql-db service’s configuration. When you start the mysql image, you can adjust the configuration of the MySQL instance by passing one or more environment variables. Do note that none of the variables will have any effect if you start the container with a data directory that already contains a database: any pre-existing database will always be left untouched on container startup.
With the environment variables that we are configuring, according to the official documentation, the database flowable will automatically be created, and the users root and flowable will be granted all privileges.
backend-rest service configuration is very straight forward. We are telling it to use DockerfileRest and passing some environment variables which tells spring-flowable-integration-1.0.0.war how to connect to the MySQL database.
Meanwhile, for our tomcat service, we are not only telling it to use DockerfileTomcat but also passing some environment variables as well. Please notice that in most of the environment variables, we are specifying the backend-rest service as host, and the port to use, is also the backend-rest service’s internal port. Not the exposed port.
Nevertheless, variables FLOWABLE_COMMON_APP_IDM and FLOWABLE_COMMON_APP_IDM-REDIRECT-URL are using localhost as host value. The do not need to be changed, because they are for internal use among Flowable’s web applications. So, the communication is within the same container.
Start the containers
Run the following command docker-compose build and build the images:
$ docker-compose build
mysql-db uses an image, skipping
adminer uses an image, skipping
Building backend-rest
Step 1/4 : FROM openjdk:8-jdk-alpine
8-jdk-alpine: Pulling from library/openjdk
e7c96db7181b: Pull complete
f910a506b6cb: Pull complete
c2274a1a0e27: Pull complete
Digest: sha256:94792824df2df33402f201713f932b58cb9de94a0cd524164a0f2283343547b3
Status: Downloaded newer image for openjdk:8-jdk-alpine
 ---> a3562aa0b991
Step 2/4 : COPY ./wars/spring-flowable-integration-1.0.0.war app.war
 ---> 328a650aaaae
Step 3/4 : COPY ./wait-for-something.sh wait-for-something.sh
 ---> c0b3e8e15063
Step 4/4 : ENTRYPOINT ["java", "-jar", "app.war"]
 ---> Running in dff38b65e12c
Removing intermediate container dff38b65e12c
 ---> 592920898ce3

Successfully built 592920898ce3
Successfully tagged openjdk:8-jdk-alpine
Building tomcat
Step 1/9 : FROM tomcat:8.0-jre8
8.0-jre8: Pulling from library/tomcat
05d1a5232b46: Pull complete
5cee356eda6b: Pull complete
89d3385f0fd3: Pull complete
65dd87f6620b: Pull complete
78a183a01190: Pull complete
1a4499c85f97: Pull complete
2c9d39b4bfc1: Pull complete
1b1cec2222c9: Pull complete
fc95b85a81f3: Pull complete
0f3868647539: Pull complete
a3921d755681: Pull complete
350389afc69e: Pull complete
Digest: sha256:268403c3fa09afd9310ced7e83ac021927dca0f04a394a80a0b0220f62e056ed
Status: Downloaded newer image for tomcat:8.0-jre8
 ---> 8391ef8f6ae4
Step 2/9 : ENV DIRPATH /usr/local/tomcat
 ---> Running in 7294bfc81b3e
Removing intermediate container 7294bfc81b3e
 ---> 61f7d119a9bb
Step 3/9 : COPY ./mysql-connector-java-8.0.16.jar $DIRPATH/lib
 ---> e70ed1c8ab5f
Step 4/9 : COPY ./tomcat-users.xml $DIRPATH/conf
 ---> da0dc3eb4e87
Step 5/9 : COPY ./wars/flowable-idm.war $DIRPATH/webapps
 ---> 21fa5e740c81
Step 6/9 : COPY ./wars/flowable-admin.war $DIRPATH/webapps
 ---> 0f083ba05938
Step 7/9 : COPY ./wars/flowable-modeler.war $DIRPATH/webapps
 ---> 800bb455304b
Step 8/9 : COPY ./wars/flowable-task.war $DIRPATH/webapps
 ---> d6b345404627
Step 9/9 : CMD ["catalina.sh", "run"]
 ---> Running in d9230b2e015c
Removing intermediate container d9230b2e015c
 ---> 364788d74804

Successfully built 364788d74804
Successfully tagged tomcat:8.0-jre8
In my case, I already had an image for mysql-db and adminer, so they were skipped. However, the Dockerfile for the backend-rest and tomcat services were executed.
Now we just need to start the services by executing the following command docker-compose up -d:
$ docker-compose up -d
Creating network "flowable-custom-rest_service-network" with the default driver
Creating volume "flowable-custom-rest_db_data" with default driver
Pulling mysql-db (mysql:5.7.26)...
5.7.26: Pulling from library/mysql
0a4690c5d889: Pull complete
98aa2fc6cbeb: Pull complete
0777e6eb0e6f: Pull complete
2464189c041c: Pull complete
b45df9dc827d: Pull complete
b42b00086160: Pull complete
bb93567627c7: Pull complete
48acc32b4863: Pull complete
6257d2da4815: Pull complete
1cd5ed3b2653: Pull complete
f4ba7ff24ae9: Pull complete
Digest: sha256:bdee7a98276ccf377d2c00b8ceaa9f65455a9376481467bbcc3d1e6b662dac5d
Status: Downloaded newer image for mysql:5.7.26
Pulling adminer (adminer:)...
latest: Pulling from library/adminer
cbdbe7a5bc2a: Pull complete
1bc86e4cff5f: Pull complete
7be142bd33f5: Pull complete
8132c9e52be3: Pull complete
a137357f3ccd: Pull complete
d20a867f685c: Pull complete
5cb708ec8e9a: Pull complete
0d70b58097d6: Pull complete
2ecb47295b41: Pull complete
121f9efe481e: Pull complete
d7c616de3ab5: Pull complete
fa518f083971: Pull complete
161cb5763d0b: Pull complete
948b9fab056c: Pull complete
066e297dac24: Pull complete
Digest: sha256:3dcbff606471c2cae9af7ab313fdbbc17c4fbb502f26f311eab140f73e559f75
Status: Downloaded newer image for adminer:latest
Creating adminer ... done
Creating mysql   ... done
Creating backend-rest-api ... done
Creating tomcat-with-flowable-apps ... done
if you list the active container using the command docker container ls -a, you should be able to see something like this:
$ docker container ls -a
CONTAINER ID        IMAGE                  COMMAND                  CREATED             STATUS              PORTS                               NAMES
3d768d4e49f4        tomcat:8.0-jre8        "catalina.sh run"        3 hours ago         Up 3 hours          0.0.0.0:8080->8080/tcp              tomcat-with-flowable-apps
615a509adabb        openjdk:8-jdk-alpine   "java -jar app.war"      3 hours ago         Up 3 hours          0.0.0.0:8181->8080/tcp              backend-rest-api
ca380f524165        mysql:5.7.26           "docker-entrypoint.s…"   3 hours ago         Up 3 hours          0.0.0.0:3306->3306/tcp, 33060/tcp   mysql
4f72bede870d        adminer                "entrypoint.sh docke…"   3 hours ago         Up 3 hours          0.0.0.0:18080->8080/tcp             adminer
To see the logs of the tomcat container, type the command docker logs -f CONTAINER_ID.
Let’s see the result
After a few moments, you should be able to access Tomcat’s home page (http://localhost:8080/).
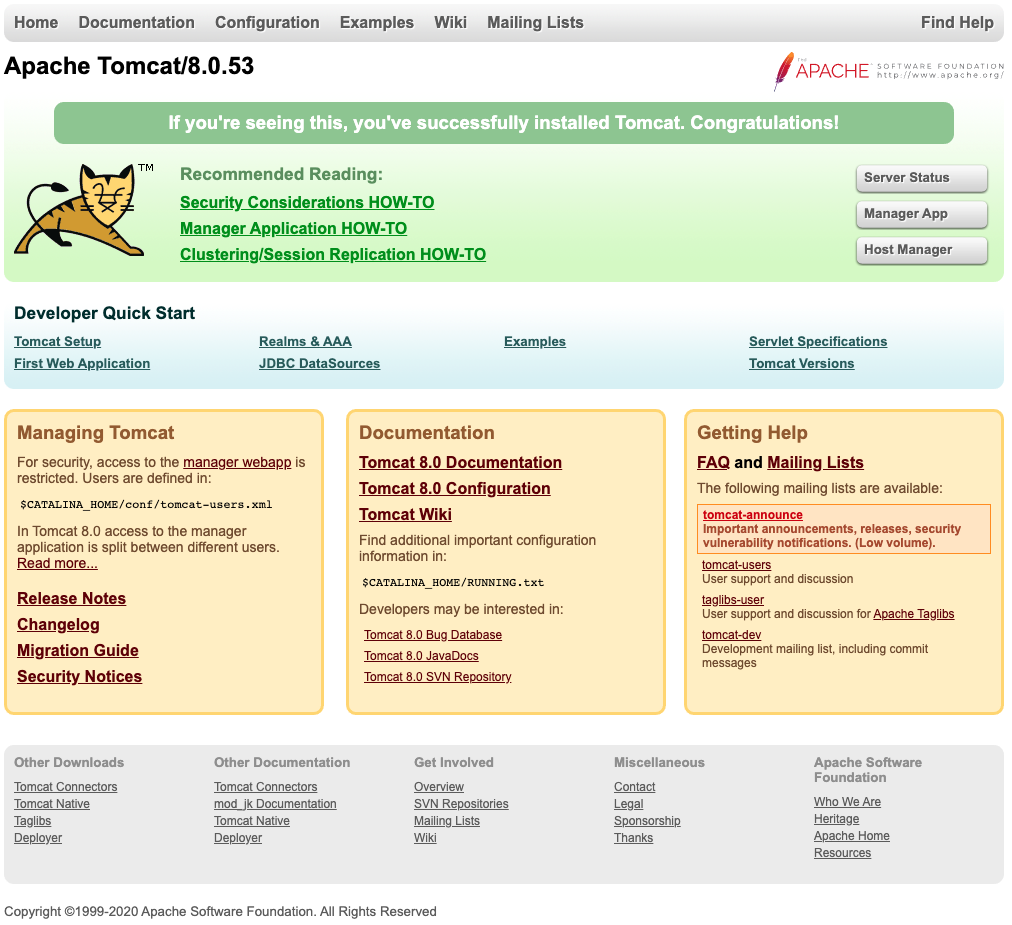
Now, click on the button <Manager App>. It should prompt you for the credentials that we previously created.
Make sure that Flowable’s apps are up and running.

If they are, you should be able to access Flowable’s apps by visiting the following URLs:
- Flowable IDM: http://localhost:8080/flowable-idm/
- Flowable Admin: http://localhost:8080/flowable-admin/
- Flowable Modeler: http://localhost:8080/flowable-modeler/
- Flowable Task: http://localhost:8080/flowable-task/
Remember that you will be prompted to log in by Flowable’s IDM. Enter admin as user and test as password.
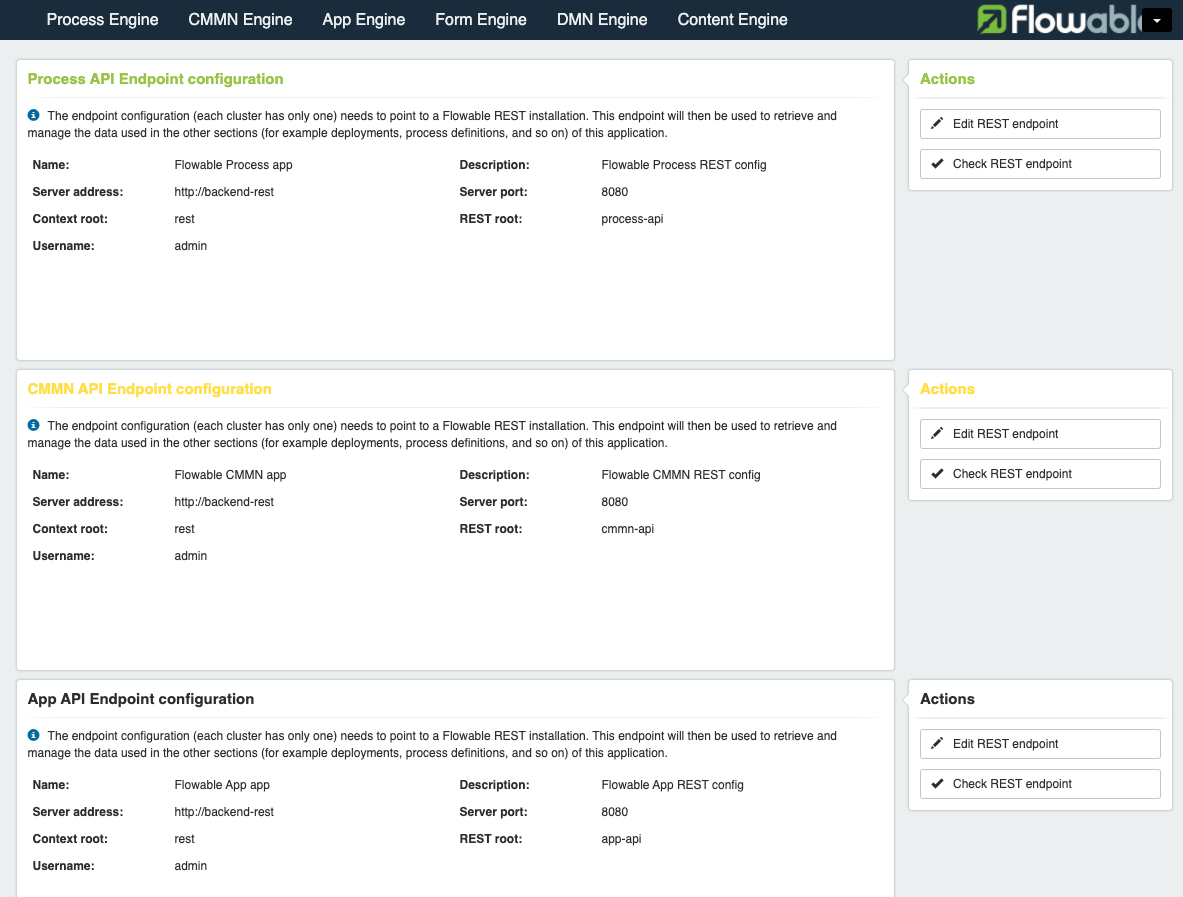
When opening Flowable’s Admin web app, and heading to the configuration screen, you should see that all the endpoints are configured to use our backend-rest service.
And if you used the Spring Boot app that we created in our post Integrate Flowable into your Spring Boot Application, you should at least see one deployment.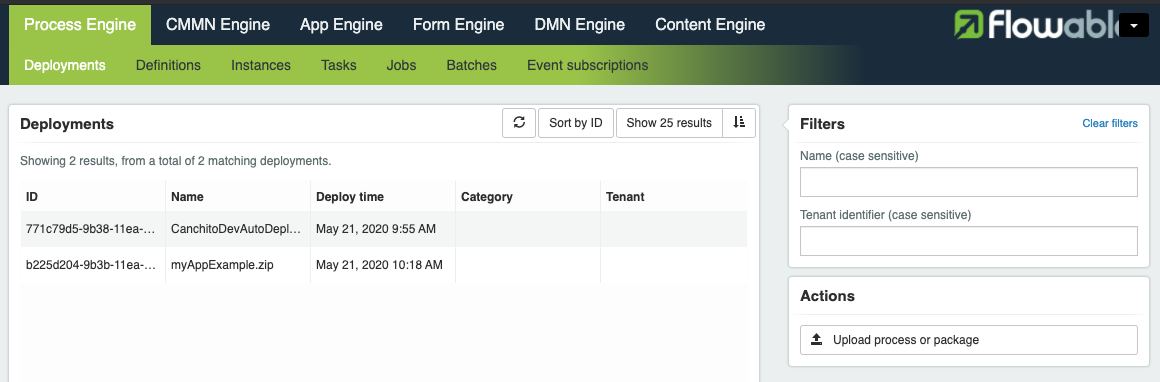
Stopping the container
When you are done working with Flowable’s apps, you can stop and remove Docker containers, images, networks and volumes with the help of this command docker-compose down -v.
$ docker-compose down -v
Stopping tomcat-with-flowable-apps ... done
Stopping backend-rest-api          ... done
Stopping mysql                     ... done
Stopping adminer                   ... done
Removing tomcat-with-flowable-apps ... done
Removing backend-rest-api          ... done
Removing mysql                     ... done
Removing adminer                   ... done
Removing network flowable-custom-rest_service-network
Removing volume flowable-custom-rest_db_data
Summary
In this post, we have shown how to deploy Flowable’s Apps in a dockerized environment, using a MySQL database, and using a custom Spring Boot REST API that implements Flowable’s engine as backend. We hope that, even though this was a very basic introduction, you understood how to use and configure them. We will try to go deeper into Flowable in upcoming posts.
Please feel free to contact us. We will gladly response to any doubt or question you might have.